Using Native Mobile Device Features from Visualforce with Phonegap
The prospect of learning hybrid mobile development is daunting for most Salesforce developers. There are just so many new things to learn all at once. And so, whilst recently learning Phonegap, Ionic, Angular and responsive-design for a side project I realised that there is a very simple bridging approach that can teach you some of the basics and that might even result in some cool apps. This bridging is achieved by making the native features of a mobile device (GPS, local storage, camera etc.) directly accessible from Visualforce.

It is dead easy. I swear. And will demystify the hybrid development paradigm for you.
Set up Phonegap
Install Phonegap and Set up an empty project
For this post I’m assuming you know that Phonegap is a framework that allows you to build web applications that are then bundled into native containers (and iOS container for Apple devices, and Android Container for Android devices etc.). The cool part is that Phonegap provides a JavaScript library to include in your web app and this library provides the link between your app and the native features of the device.
Note: “Cordova” and “Phonegap” are often used interchangeably, at this point it is not important to consider the difference between the two. You will even notice that the `cordova` command can often be substituted for the `phonegap` command (and vice versa) in the official documentation. Don’t panic.
The image below depicts this in a scary but clear way (don’t panic).
Anyway, all you need to do at this stage is to:
- Install Phonegap as per the instructions and,
- Set up a blank project (RTFM, but ignore the last command ‘phonegap run android’).
Setup Native Feature Access
Phonegap has the notion of “plugins” which provide your project with special capabilities. In this case we’re going to trigger the native notification capability of our mobile device from Visualforce so you’ll need to add this plugin to your project.
phonegap plugin add org.apache.cordova.dialogs
Build your Project and Pilfer the JavaScript
Next you’ll need to build the Phonegap project. This action takes your webapp (which you haven’t customised at all yet), creates the native code for the target platform you choose (iOS in this case) and smashes them together. It also generates the JS proxy libraries that will be used to access the device’s native features. We want these. We want them real bad.
1. First step is to build (you only do this once for each project):
phonegap platform add ios
phonegap build ios
You can now test that everythings built correctly by running the iOS emulator.
phonegap emulate ios
2. Once you’ve confirmed that the app can run, it’s time to steal that JS.
If you navigate through to: [your project name] > platforms > ios > www, you will need to zip/archive three items:
- cordova_plugins.js
- cordova.js
- plugins (which is a folder)
Collectively these are required to access the device features from JavaScript (reminder: Don’t Panic). Keep this zip-file safe because you’re going to upload it as a static resource later on.
Create or Modify Your Salesforce Project
- Set up a new Developer Environment, or just sign into one you’ve previously set up.
- Upload the previously archived files as a static resource. I’ve called mine “Cordova”.
- Next, create a new blank Visualforce page. It doesn’t need to have a controller. I’ve called mine “Hybrid”.
- Add the “cordova.js” library to the page. Note that you don’t need to include all of the other JS libraries in the file because the main library file will load all the others.
<script type="text/javascript" src="{!URLFOR($Resource.cordova, 'cordova.js')}" />
5. Next, add the following code. The first bit (the JavaScript) waits for the cordova library to finish loading (‘deviceready’) and then overrides the default JavaScript “alert” functionality with the appropriate native notification functionality. The outputlink following that triggers a JavaScript alert() so that we can test this functionality.
<script>

  document.addEventListener('deviceready', function () {

    if (navigator.notification) { // Override default HTML alert with native dialog

        window.alert = function (message) {

            navigator.notification.alert(

                message,    // message

                null,       // callback

                "Native Dialog", // title

                'OK'        // buttonName

            );

        };

    }

  }, false);

</script>

<apex:outputLink value="#" onclick="alert('Hello');">Native Notification</apex:outputLink>
6. Nearly done! Now all you need to do is set up a Force.com Site and make your new page accessible from that site. If you’ve never done this before never fear, it’s very easy and shouldn’t take more than 5 minutes.
Take note of the Force.com Site URL that can be used to access your page directly. You’ll need this in the next step.
Point your Phonegap project to your Force.com Site page
1. You’ll find a file called “config.xml” in the root of your Phonegap project. Within this file is a line that reads:
<content src="index.html" />
2. Change the value of the “src” attribute to be the Force.com Site URL for your new page. Save this file and then build the Phonegap project once again.
phonegap build ios
3. Once that’s done, launch the emulator.
phonegap emulate ios
Win at Life
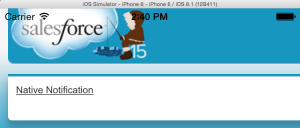
You’ll be presented with a non-mobile looking Visualforce page within the emulator window. If you click the link within this window you won’t get a native JavaScript alert() but instead a native notification! Well done, you are now a mobile developer!!1!one!!
This is certainly a very simple example, but all other native features of the mobile device are accessible in a very similar way. I invite you to explore these capabilities more, let me know how you get on.
Great post Wes, using Cordova.js as static resource is interesting approach.
Abhinav Gupta
February 7, 2015 at 7:43 pm
Reblogged this on We love salesforce.
Ashish Agarwal
February 8, 2015 at 8:06 pm
Reblogged this on SutoCom Solutions.
SutoCom
February 9, 2015 at 6:33 pm